Source: MiniDisc Wiki contributors · September 3, 2026 snapshot · CC BY 4.0, except where otherwise credited.
Attribution and changes
Adapted from “Linear PCM Audio to Hi-MD with SonicStage”. Links, layout and file names normalized; missing database fields restored; remote embeds replaced with links. Manufacturer manuals and separately credited photographs retain their original attribution.
Hi-MD devices support lossless Linear PCM audio. Using SonicStage, you can transfer lossless WAV tracks to a Hi-MD device with the steps outlined below.
The steps to install SonicStage on Windows 10 are here: sonicstagew10
1. Hi-MD Mode:
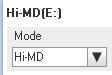
With your Hi-MD recorder connected to the PC, open SonicStage and select the transfer menu. Make sure the disc you are going to use is in "Hi-MD" mode, as indicated by a menu at the top left of the right side of the transfer screen:
2. Create Track:
Create a compatible audio track using software such as Audacity or ffmpeg. The WAV file needs to have a sample rate of 44.1kHz, a bit rate of 1411kbps, and a bit depth of 16 bits. Creating such a track in Audacity would look something like this:
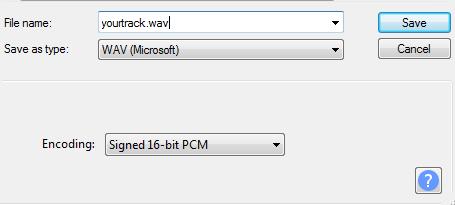
Remember, the WAV file must be encoded exactly like this or it won't work.
3. Import:
Import the track into SonicStage as you would any other track. After importing completes, click on the toolbox icon in between the transfer sides, which will bring up a window. Select the option "Standard transfer mode." This will allow the WAV file to be transferred as PCM audio.
4. Transfer:
Transfer the track as you would any other by clicking on the arrow facing to the right, or by dragging and dropping. After the transfer completes, the recording mode for the file on the disc should show as PCM:

And that's it! You can now repeat this process to transfer as much lossless audio to a disc as you wish.